Is your computer refusing to start? Maybe it crashes with a Blue Screen of Death or emits a burning smell. These issues often point to a faulty power supply unit (PSU) or motherboard. Diagnosing the culprit can save you time and money. According to a 2023 study by Puget Systems, 30% of PC failures stem from power supply issues, while 25% relate to motherboard problems. Pinpointing the root cause is key to getting your system back on track. This guide walks you through clear, practical steps to determine whether your PSU or motherboard is failing, using simple tools and tests.
Why Identifying the Issue Matters
A bad power supply or motherboard can halt your PC’s performance. The PSU delivers power to all components, while the motherboard connects them. If either fails, your system suffers. Misdiagnosing the issue wastes time and money on unnecessary repairs. For example, replacing a working PSU when the motherboard is faulty is a costly mistake. This article helps you avoid that. We’ll cover symptoms, testing methods, and troubleshooting tips. You’ll learn how to use tools like a PSU tester or paperclip test and check for physical damage. Let’s dive into the signs of failure and how to test each component.
Common Symptoms of a Bad Power Supply
Power supply issues often show clear signs. Recognizing these helps narrow down the problem. Here are the most common symptoms of a failing PSU:
- Computer Won’t Turn On: Pressing the power button yields no response. No lights, no fans, no beeps.
- Random Shutdowns: The system powers off unexpectedly, even during light tasks.
- Burning Smell: A distinct odor from the PSU suggests overheating or component failure.
- Power Fluctuations: Fans spin erratically, or the system restarts without warning.
- Blue Screen of Death (BSOD): Frequent BSOD errors may indicate unstable power delivery.
- Noisy PSU: Loud buzzing or whining from the internal fan points to wear or damage.
A 2024 report from TechRadar notes that 40% of PSU failures cause system instability. Check for these signs before assuming the motherboard is the issue.
Common Symptoms of a Bad Motherboard
Motherboard issues mimic PSU problems but have distinct clues. Look for these signs:
- No POST (Power-On Self-Test): The system fails to boot, with no BIOS beep codes or display.
- Frequent Crashes: The PC freezes or restarts during heavy tasks like gaming.
- Component Failure: USB ports, audio, or graphics card slots stop working.
- BIOS Issues: Corrupted BIOS or failure to enter BIOS setup.
- Physical Damage: Visible burns, corroded connections, or bulging electrolytic capacitors.
- Speaker Beeps: Unusual BIOS beep codes during startup.
Motherboards, like the ASUS ProArt Z790-CREATOR WIFI or Gigabyte GA-H110-D3A, can fail due to voltage spikes or manufacturing defects. Check these symptoms to rule out PSU issues.
Step-by-Step Guide to Diagnose the Problem
Diagnosing whether the PSU or motherboard is bad requires systematic testing. Follow these steps to pinpoint the issue. You’ll need basic tools like a screwdriver, a paper clip, and optionally a PSU tester or multimeter.
Step 1: Check the Basics
Start with simple checks to rule out external issues:
- Wall Outlet: Plug the PC into a different outlet or use a surge protector to ensure stable power.
- Power Cord: Inspect the power cord for fraying or damage. Swap it with a known working cord.
- Power Switch: Ensure the power switch on the PSU is on. Test the power button on the computer case.
- Connections: Verify the 24-pin motherboard connector and 8-pin (4+4) CPU cable are secure.
Loose power connections or a faulty wall outlet can mimic PSU or motherboard failure. Fix these first.
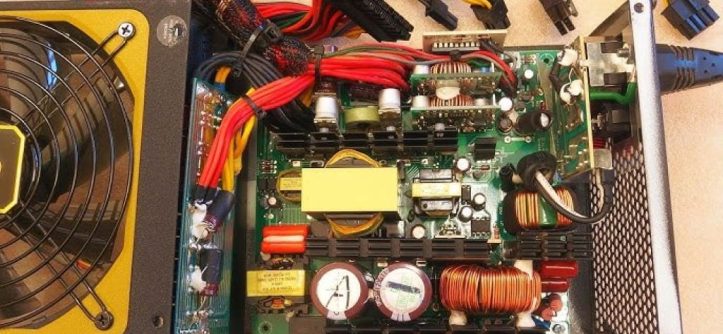
Step 2: Perform a Visual Inspection
Examine both components for physical damage:
- PSU: Look for burn marks, a burning smell, or a damaged internal fan. Check for loose cables or corroded connections.
- Motherboard: Inspect for bulging capacitors, burn marks, or cracked solder joints. Check the CMOS battery for corrosion.
Physical damage, like corroded connections on a motherboard X670E Aorus Pro X, often indicates failure. If you spot damage, replace the affected component.
Step 3: Test the Power Supply with a Paperclip Test
The paperclip test checks if the PSU turns on without the motherboard. Here’s how:
- Unplug the PC from the wall outlet.
- Open the computer case and locate the 24-pin cable connected to the motherboard.
- Disconnect the 24-pin connector from the motherboard.
- Bend a paper clip into a U-shape.
- Insert one end into the green pin (usually pin 16) and the other into a black pin (ground pins, typically 15 or 17).
- Plug the PSU back into the wall outlet and flip the power switch.
- If the PSU fan spins, the PSU is likely functional. If not, it may be faulty.
This PSU jumper test, often called the paperclip test, isolates the PSU. A failed test suggests a bad power supply, like an EVGA 500W or Corsair CX430.
Step 4: Use a PSU Tester or Multimeter
For precise testing, use a power supply tester or multimeter:
- PSU Tester: Plug the 24-pin cable into a PSU tester. It displays voltage readings for all rails. Compare against ATX PSU standards (e.g., 5V, 12V rails). Low or unstable voltages indicate a failing PSU.
- Multimeter: Set to DC metering mode. Test the 24-pin connector’s voltages (green wire for power-on signal, black wire for ground). Refer to an ATX pinout chart for correct values.
Tools like Open Hardware Monitor can also track voltage measurements in real-time. Inconsistent PG values or voltage fluctuations confirm PSU issues.
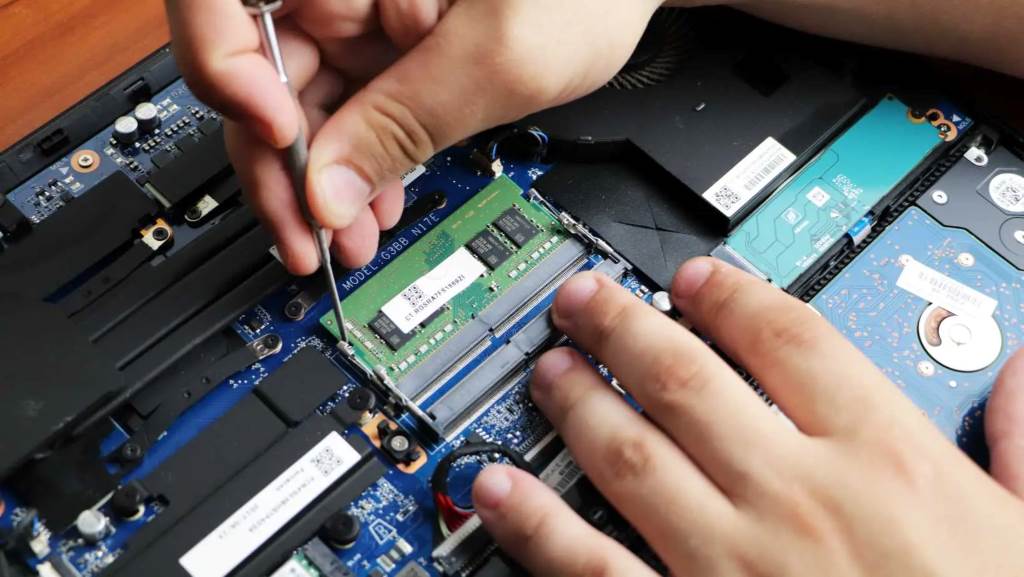
Step 5: Test the Motherboard
If the PSU passes tests, check the motherboard:
- Open Air Test Bench: Remove the motherboard from the case and place it on a non-conductive surface. Connect only the PSU, CPU, and one RAM stick. Power on. If it boots, the case or other components may be shorting the motherboard.
- BIOS Beep Codes: Listen for speaker beeps. Refer to the motherboard manual (e.g., ROG Crosshair VIII Hero) for beep code meanings. No beeps or continuous beeps suggest motherboard failure.
- Swap Components: Test with a different PSU, RAM (e.g., G.Skill RipJaws), or CPU (e.g., Intel 6700k). If the system boots, the original component may be faulty.
- BIOS Reset: Clear the CMOS by removing the battery or using a jumper. This resets BIOS settings, fixing corruption issues.
Motherboard issues, like a short-circuit cutout or motherboard damage, often require professional repair or replacement.
Step 6: Monitor System Stability
If the PC boots, test for stability:
- Run stress tests using software like PC ReFix to check for crashes.
- Monitor temperatures and voltages with Open Hardware Monitor.
- Check for BSOD errors or random restarts, which may indicate subtle PSU or motherboard issues.
System instability, especially with high-power components like an RX 590 or RTX 3060, often points to insufficient power requirements or motherboard failure.
Read Also:
- How to Install a Screen Door Pet Grille: Protect Your Home and Pets
- Financial Software Development Trends: Navigating the Future of Fintech
- Modding Made Easy: Your Guide to Installing Mods on Xbox
Key Differences Between PSU and Motherboard Issues
Understanding the differences helps you diagnose faster:
- PSU Issues: Affect all components. No power, burning smell, or fan failure are common. Tests like the paperclip test or PSU tester confirm PSU problems.
- Motherboard Issues: Cause specific failures, like non-working ports or BIOS errors. Physical damage or beep codes point to the motherboard.
For example, a failing Corsair CX450 may cause power failure, while a motherboard M12SWA-TF might prevent VGA video output.
Additional Tips for Accurate Diagnosis
- Use Quality Components: Modular power supplies, enclosed power supplies, or those with an 80 Plus Gold rating (e.g., ATX 3.0) are more reliable.
- Check for Voltage Spikes: A surge protector or UL-listed PSU reduces risks from power fluctuations or voltage surges.
- Consult Professionals: If unsure, visit Micro Center or GEEK SQUAD for expert diagnostics.
- Test Components Separately: Isolate hard drives, graphics cards, or other peripherals to rule out secondary issues.
These steps ensure you don’t overlook issues like a faulty heat sink or cable mod cables causing instability.
When to Replace the PSU or Motherboard
Replace the PSU if:
- The paperclip test fails.
- Voltages are outside ATX standards.
- You notice a burning smell or physical damage.
Replace the motherboard if:
- BIOS beep codes indicate failure.
- Ports or slots don’t work.
- Visible damage or corrosion is present.
For example, a failing PSU might damage a motherboard like the ASUS ProArt Z790-CREATOR WIFI, requiring both to be replaced.
Conclusion
Diagnosing a bad power supply or motherboard is straightforward with the right steps. Start with basic checks, inspect for physical damage, and use tools like a paperclip or PSU tester. Test the motherboard with an open air setup or BIOS reset. By following this guide, you’ll identify the faulty component and avoid costly mistakes. Don’t let power failure or system instability frustrate you. Grab a screwdriver, run these tests, and get your PC running smoothly again. For professional help, visit Micro Center or check Bravo Electro for reliable PSUs.
FAQs
How Do I Know If My PSU Is Failing Without a Tester?
Look for no power, random shutdowns, or a burning smell. Perform a paperclip test to check if the PSU fan spins.
Can a Bad PSU Damage My Motherboard?
Yes, a faulty PSU can send voltage spikes, causing motherboard damage or short-circuits.
What Are BIOS Beep Codes?
Beep codes are audio signals from the motherboard indicating specific errors. Check your motherboard manual for details.
How Can I Test My Motherboard Without a PSU Tester?
Use an open air test bench with minimal components or swap with a known working PSU.
Should I Repair or Replace a Faulty Motherboard?
Replace it. Repairs are costly and less reliable than a new motherboard.
References:
- Puget Systems. (2023). Hardware Failure Rates in PCs. https://www.pugetsystems.com/labs/articles/hardware-failure-rates-2023/
- TechRadar. (2024). Common Causes of PSU Failures. https://www.techradar.com/news/psu-failure-causes
- Bravo Electro. PSU Testing Guide. https://www.bravoelectro.com/psu-testing
- Micro Center. Motherboard Diagnostics. https://www.microcenter.com/tech_center

Leave a Reply