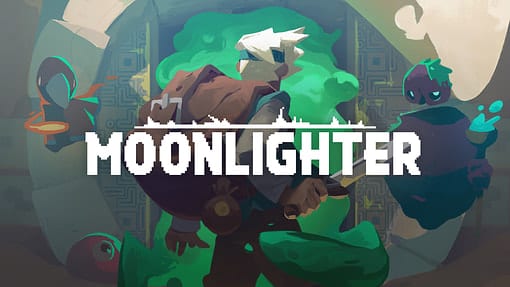
It is important to remember that this game, created by the Spanish company Digital Sun Games, is an adventure RPG, similar to the old Zelda , with Rogue-like elements that will make this title much more challenging. On the other hand, we have the mechanics of sales, which will be decisive for Will, our character, to evolve both as a team and as a merchant. And here we start with our moonlighter tips!
12 moonlighter tips
1. Study the mechanics of the enemies
It is important to understand that this game is not a hack and slash . It is impossible to enter a dungeon and believe that we will overcome it on the first try. Each enemy has a way of attacking and a resting point where you can connect the attacks. These patterns will help you avoid getting hit while attacking and keep your life bar at the top.
Most of the retreats to wait for the enemy to attack you will do with the roll . Control the time it will take for an opponent to respond and roll at exactly the right moment. This will give you a small moment of invulnerability that will be essential throughout the game.
The bosses of each dungeon have these types of mechanics and you will see that it is not that difficult to defeat them once you memorize them and know the moments to attack, defend or evade.
Read more: How to Optimize Pc for Gaming?
2. Learn to choose your weaponry
At the beginning of the game we start with a broom that is quickly replaced by a sword and a training shield. It is very likely that many end up using this combination throughout the game as it is the most all- around . However, we have the possibility to equip a secondary weapon. Our options are bows, daggers, long swords, and spears. The bow would be the perfect option to have as secondary to any choice we make with the rest.
The sword and shield will allow us to move and attack quickly, but the damage will be less than that of long swords. On the other hand, long swords must be used with two hands, that is why we will not have our shield at our disposal. However, if your strategy and study of enemy mechanics are correct, you may not need to use the shield.
Daggers are much shorter in range, but attack speed is higher. If you can learn to roll safely, the use of daggers will allow you to move around the map and make quick but safe attacks.
Finally, the lances will allow us to attack with a higher space range, avoiding direct hits like golems with sword and shield. It will help us keep enemies at a safe and reasonable distance.
All these weapons, together with the bow always as a second option, will help us pass each dungeon much more easily.
Discover: How it feels to chew 5 gum
3. Make cheap potions and don’t forget to equip them
At first we will be surprised by the price of the potions that Eris the sorceress makes. However, Eris is able to create the same potion at a lower price in exchange for the jellies released by slimes, the most famous creatures in many RPGs. This is why we advise you to always keep space in your backpack for these jellies, as they will be very useful when you return to town.
Never go to a dungeon without having potions equipped! In addition, we recommend that you always pay attention to the remaining number since once you enter a room in a dungeon and there are enemies in it, you will not be able to use your backpack. This will leave you with only the remaining potions equipped (maximum 5), even if you have 10 or more in your backpack, you will not be able to use them. Discover now: Can you see who views your facebook story?
4. Search the secret rooms in each dungeon
As you go through each room in the three levels of the dungeons, you will see that most have holes. Some of these holes could glow, this means that down there is a secret room where you could find very valuable objects.
There are different types of secret rooms. In some we will only go down and find the objects scattered in the room; in others we could find an altar and a volume that is very valuable. We recommend that you leave another object on this altar, regardless of its value.
Finally, we will have a room in which we will see a pillar connected to a treasure. The mechanics of this place are very important. From here you can get valuable objects, if we have the agility and the right equipment. As we approach this pillar, we can activate it (do not open the chest because all the mechanics will be deactivated), once this happens, three portals will open that will bring with them a horde of enemies … Defeat them!
Once you’re done, the pillar will send energy to the chest and “level up” it. We can repeat this process three more times, going through wooden, gold and magic chests; the latter will have extremely expensive items.
We advise you to know when to stop. If you don’t have any potions left and the enemies are getting harder and harder, it’s best to settle for the chest level you managed to get to, as you could die in the next horde and lose absolutely everything.
5. Never forget to lean on the three items of the merchant
There are three fixed items to aid you throughout your Moonlighter experience : The Merchant’s Amulet, The Merchant’s Mirror, and The Merchant’s Emblem. Once you have reached the third level of the Golem Dungeon, you will have all three at your disposal.
The Merchant’s Amulet is the first one we receive, it will help us get out of the dungeons for a small price. The emblem will open a one-way portal to Rynoka, the town of Will. This will allow us to return when we already have the backpack to the maximum or even in an emergency situation. Luckily, you can use it at any time.
The Merchant’s Mirror will allow us to transform objects and receive a small percentage of their true price. This will help us to clean the space of the backpack, since we will see it overloaded with objects of little value in a very short time. Instead of throwing them away, we can use the mirror and get a little benefit from it. We recommend, if you are not going to return to look for some objects that you leave in the chests, that you do not forget to use the mirror even on the screen of the chests that you have opened.
Lastly, we have The Merchant’s Emblem. This object is the most important as it will allow us to open a portal to and from Rynoka. You can go back, sell your items, buy potions, even sleep, and then return to the dungeon. We advise you not to forget to return to the dungeon through the portal. We are sure that more than once you will go to the main door and the portal will have already disappeared.
6. Benefit from cursed items
On our way we will find chests that contain objects with a certain type of curse. You will not be able to join them with objects of the same type since the system does not classify them as pairs. This will cause you to lose more space in your backpack.
You will find objects with curses that not only allow you to place them on the sides of your backpack, others will destroy the object in the indicated direction, we will also find some that will be of great help and that will allow us to teleport the object in the indicated direction directly to your store. Finally there is a curse that multiplies the object based on the number you have of the other item indicated in the address. This means that if you get a Golem Tome and place it next to five Nutritive Jellies, upon returning to Rynoka the jellies will turn into five Golem Tomes.
Study very well the best way to organize your backpack and get the most out of your return to the villa. You could make a lot of money with this strategy.
7. Remember to have a mascot on your team
In the latest free expansion, Friends and Foes , the Moonlighter team included pets that can help you by attacking enemies or performing some type of task that can improve your experience in the dungeons.
During the course of the game, some enemies will leave an egg that, when brought to Rynoka, will be in a small farm next to your store. After three days, a pet version of that specific enemy will hatch from this little egg.
You can equip it as a pet and it will accompany you on your adventure. Choose the one that best suits your style of play. At Super Fans we believe that Mimic, the chest mascot, is one of the most useful. We will have at our disposal a chest that, in addition to attacking, collects items and you can access its deposit whenever you want. This will increase the number of items you can carry on each raid to the dungeons.
8. Never forget to use the wish list
In order to improve our weapons, make potions or improve them with an enchantment, the characters of the town will ask us for different types of objects. The best way to know that an object is required for a specific task is to add it to our wish list. This will mark all the objects that we get in the dungeons with a star, so we know that we should not leave them on the ground or sell them.
We recommend that, once you have manufactured or upgraded your equipment, you uncheck said item from the wish list, since the game does not do it automatically. That could save you unnecessary items and take up more space in your prized backpack.
9. Sell only one item until you find the ideal price
In Moonlighter you will have to test, little by little, with the prices of each object. Your customers may be angry, saddened, agree with the price, or be surprised at how cheap it is.
Your mission will be to find that middle ground. The advice we give you is to place a single object per type and try lowering and raising the prices until you find the right one. Luckily, your notepad will record the price for each customer reaction. This will help you have a reference when replacing an item that has already been sold at the correct price.
There is also an option that we have investigated. According to mmoingame.com, you can use a rule that will allow you to quickly find the ideal price for each item. For this you will have to go find the sale price that Le Retailer has, the other merchant that you invite to the town and sell you the objects at a much higher value. The rule of thumb is to divide the price of that item by 3.6 and approximate the result a little downward. It is very likely that you will be able to find the right price in less time.
However, we at SuperFans really enjoy the pricing mechanic, so you could use this rule when playing Moonlighter for the second time (Game +).
10. Accept assignments that you can fulfill
At one point in the game, you will start receiving customers who will order items from you that are a little harder to come by. Others will ask you to bring them “notes” of a specific monster, these notes will be obtained by eliminating this enemy. The problem is in the days (in the game) that it can take you to complete this mission. However, once you have a controlled dungeon and you know you can fulfill it, accept the assignment. It is very common to accept all of them and think that we can fulfill them. Avoid this at all costs.
We also recommend that you reserve in the additional chests of your store, at least 5 objects of each type, in this way you can have reservations in case a client asks you for something and you can fulfill the order without having to waste your days in the dungeons.
When you open a new dungeon, customers will always come asking for objects that you do not know yet, we advise you not to accept these requests, you will not be able to complete them so easily.
Finally, you could buy in Le Retailer a specific object that you need, so you will not lose the reward money.
11. Collect items from several rounds before selling
As we already know, the mechanics of Moonlighter are simple: enter the dungeons, try to advance as far as possible and get out alive to sell the items in the store. This cycle will be repeated without stopping and it is precisely the charm of this game.
We recommend that, once you have advanced the first hours of play, you make sales every two or three rounds. In this way, you can take advantage of the hours of the day to continue venturing in the dungeons and fulfilling the orders of the clients.
Store all your items neatly in the extra chests in your room (You have plenty of space!) And when you have a large supply of each, have a great sales day.
In the last renovations of your store, you can hire an assistant who will help you against thieves, but will also offer to sell your objects while you can continue to raid the dungeons. However, he will charge you 30% of your earnings. Depending on the situation you find yourself in, this could be very helpful. Use this option when you consider that you cannot attend your store personally.
12. Don’t forget the decorations!
The last character we invited to Rynoka is Hawker, a merchant who will help you with decorations to your store. These ornaments will give you bonuses to the sale mechanic. Some will allow you to increase your sales profit. If you combine them well, you could make almost double the money a day. Other decorations increase the length of the day, the speed at which customers walk into your store, the influx of customers and also the possibility of fewer thieves entering.
You can place these decorations in the corners of your store’s counter and, in the latest renovations, you can hang others on the walls. It is important to take this into account since we will think that there are objects that have disappeared, but the reason is that they are not enabled, if they are not wall decorations.


Leave a Reply